Building Structures

BACKGROUND
Consider where the strength in structures, such as bridges and towers comes from. While the strength of the materials themselves is important, the design of the structures is just as vital. Steel and concrete are strong, quality materials, but with careful construction, these materials can be assembled to withstand even greater forces. Bridges and towers are expected to support large loads even in extreme weather conditions and natural disasters. This requires a variety of forces to be considered during their design and construction. Compression and tension are the opposing forces of push and pull. Shear forces are responsible for pushing different parts of a structure in opposite directions. Torsion describes twisting forces.
Looking at the buildings and structures that surround us, you will see geometric shapes are commonly used. Various geometric shapes are employed to support structures by distributing weight across an area. The dominance of triangles in structural designs is due to their ability to withstand force. When the top of an equilateral triangle has a load applied to it, the two adjacent sides will experience compression. However, the base (third side) will experience tension. By forces on the base can be decreased by increasing the length of the sides and decreasing the length of the base. Triangles are more likely to maintain their shape than rectangles as the sides of the triangle remain the same, meaning the angle between them cannot change.
In this investigation, students build multiple bridges using construction paper. By placing increasing mass on top of the bridges, students test the load-bearing capacity of each configuration. In the second procedure, they will create multiple towers out of construction paper in 5 different configurations and test the load capacity of each. Finally, in the third procedure they design your own structure based on your learning from the first two prototypes and test its loading capacity.
METHOD - STUDENT ACTIVITY
Assembling and Testing the Bridge Prototypes
- To create support surfaces for the bridge, create 2 stacks of books (or similar objects) and place them 20 cm apart. The books will need to be at least 10 cm of the ground and the length of an A4 piece of paper.
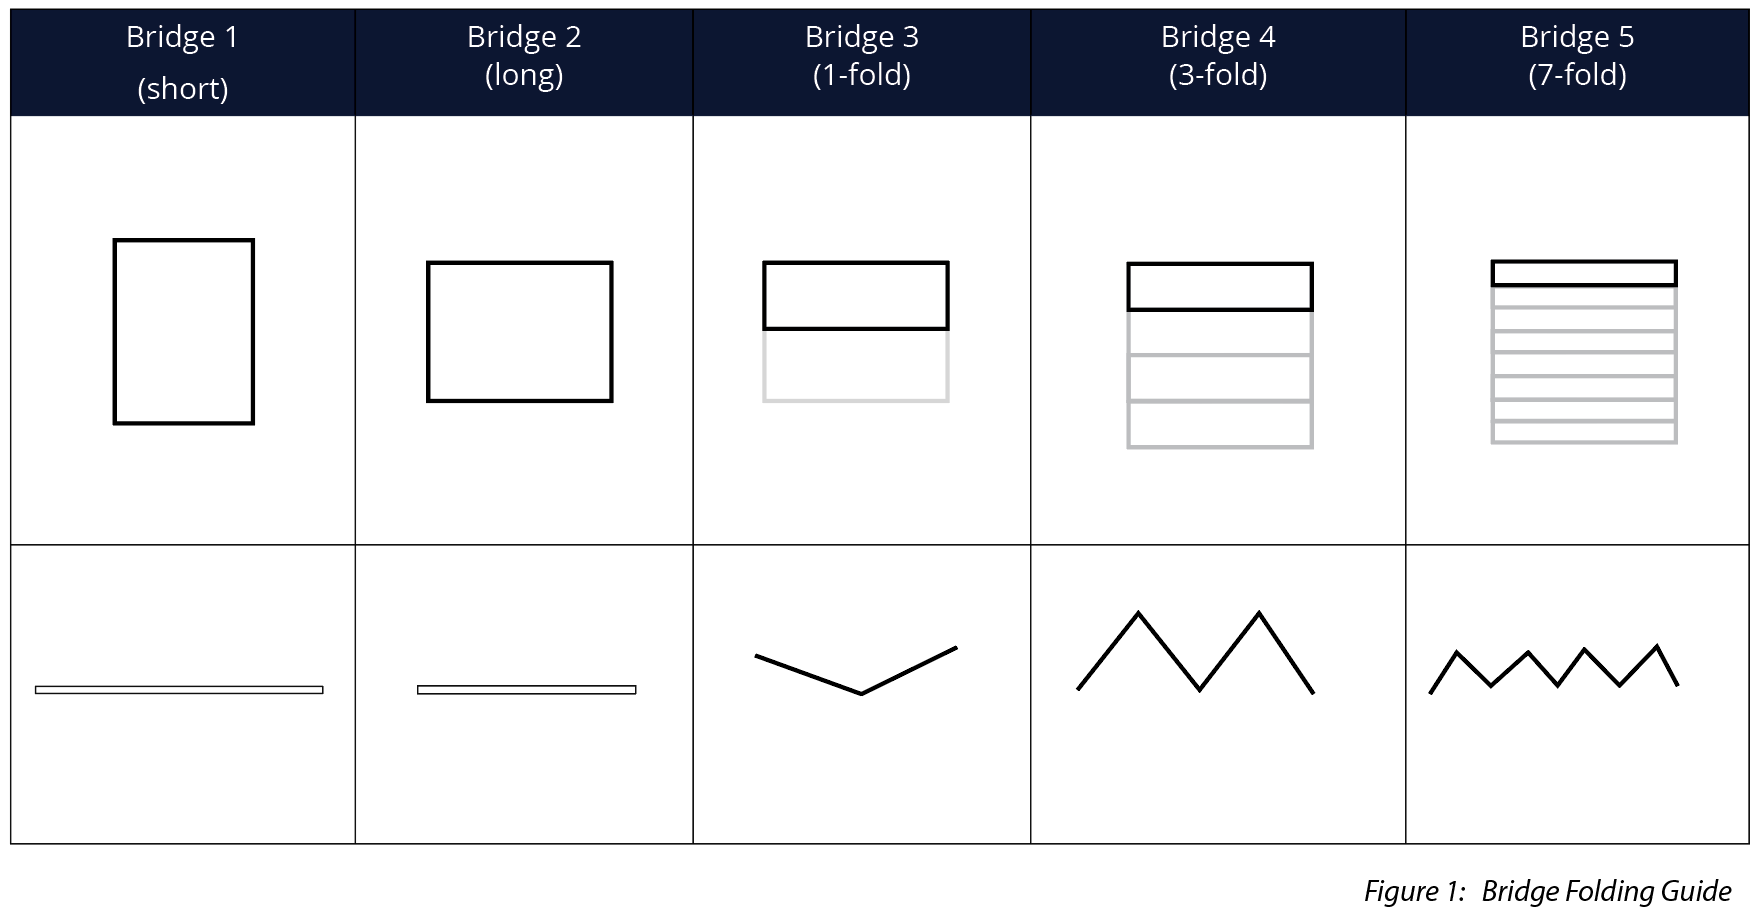
- To build a short bridge, place the edges of the construction paper between the 2 support surfaces. The centre of the sheet of paper should be in the middle of the 20 cm wide gap with the short axis of the paper across the gap.
- Place the weigh boat in the centre of the paper. Increasingly add mass to the weigh boat in 1-5g increments. Continue to add mass to the paper until it collapses. Record the maximum load the bridge can withstand before collapsing in Table 1.
- Turn the paper 90° to construct a long bridge. The long axis of the paper should be across the gap of the 2 support services.
- Place the weigh boat in the centre of the paper. Increasingly add mass to the weigh boat in 1-5g increments. Continue to add mass to the paper until it collapses. Record the maximum load the bridge can withstand before collapsing in Table 1.
- Fold the construction paper in half lengthwise to construct a 1-fold bridge and place the folded sheet over the gap. The long axis should be oriented across the gap.
- Place the weigh boat in the centre of the folded paper and add mass in 1-5g increments. Record the maximum load the bridge can withstand before collapsing in Table 1.
- Make 2 more folds to create a 3-fold bridge. Once folded, the paper should look like the letter “M” when viewed from the side.
- Place the weigh boat in the centre of the paper and add mass in 1-5g increments. Record the maximum load the bridge can withstand before collapsing in Table 1.
- Refold the paper in an accordion style until there are 7 folds to create a 7-fold bridge.
- Place the weigh boat in the centre of the paper and add mass in 1-5g increments. Record the maximum load the bridge can withstand before collapsing in Table 1.

Assembling and Testing the Tower Prototype
- To create a long triangular prism, fold a piece of paper into thirds along the long axis. Once the prism shape is formed, secure the open ends together with sticky tape. Stand the prism upright so that it forms a tower.
- To create a long rectangular prism, fold another piece of paper into fourths along the long axis. Once the prism shape is formed, secure the open ends together with sticky tape. Stand the prism upright so that it forms a tower.
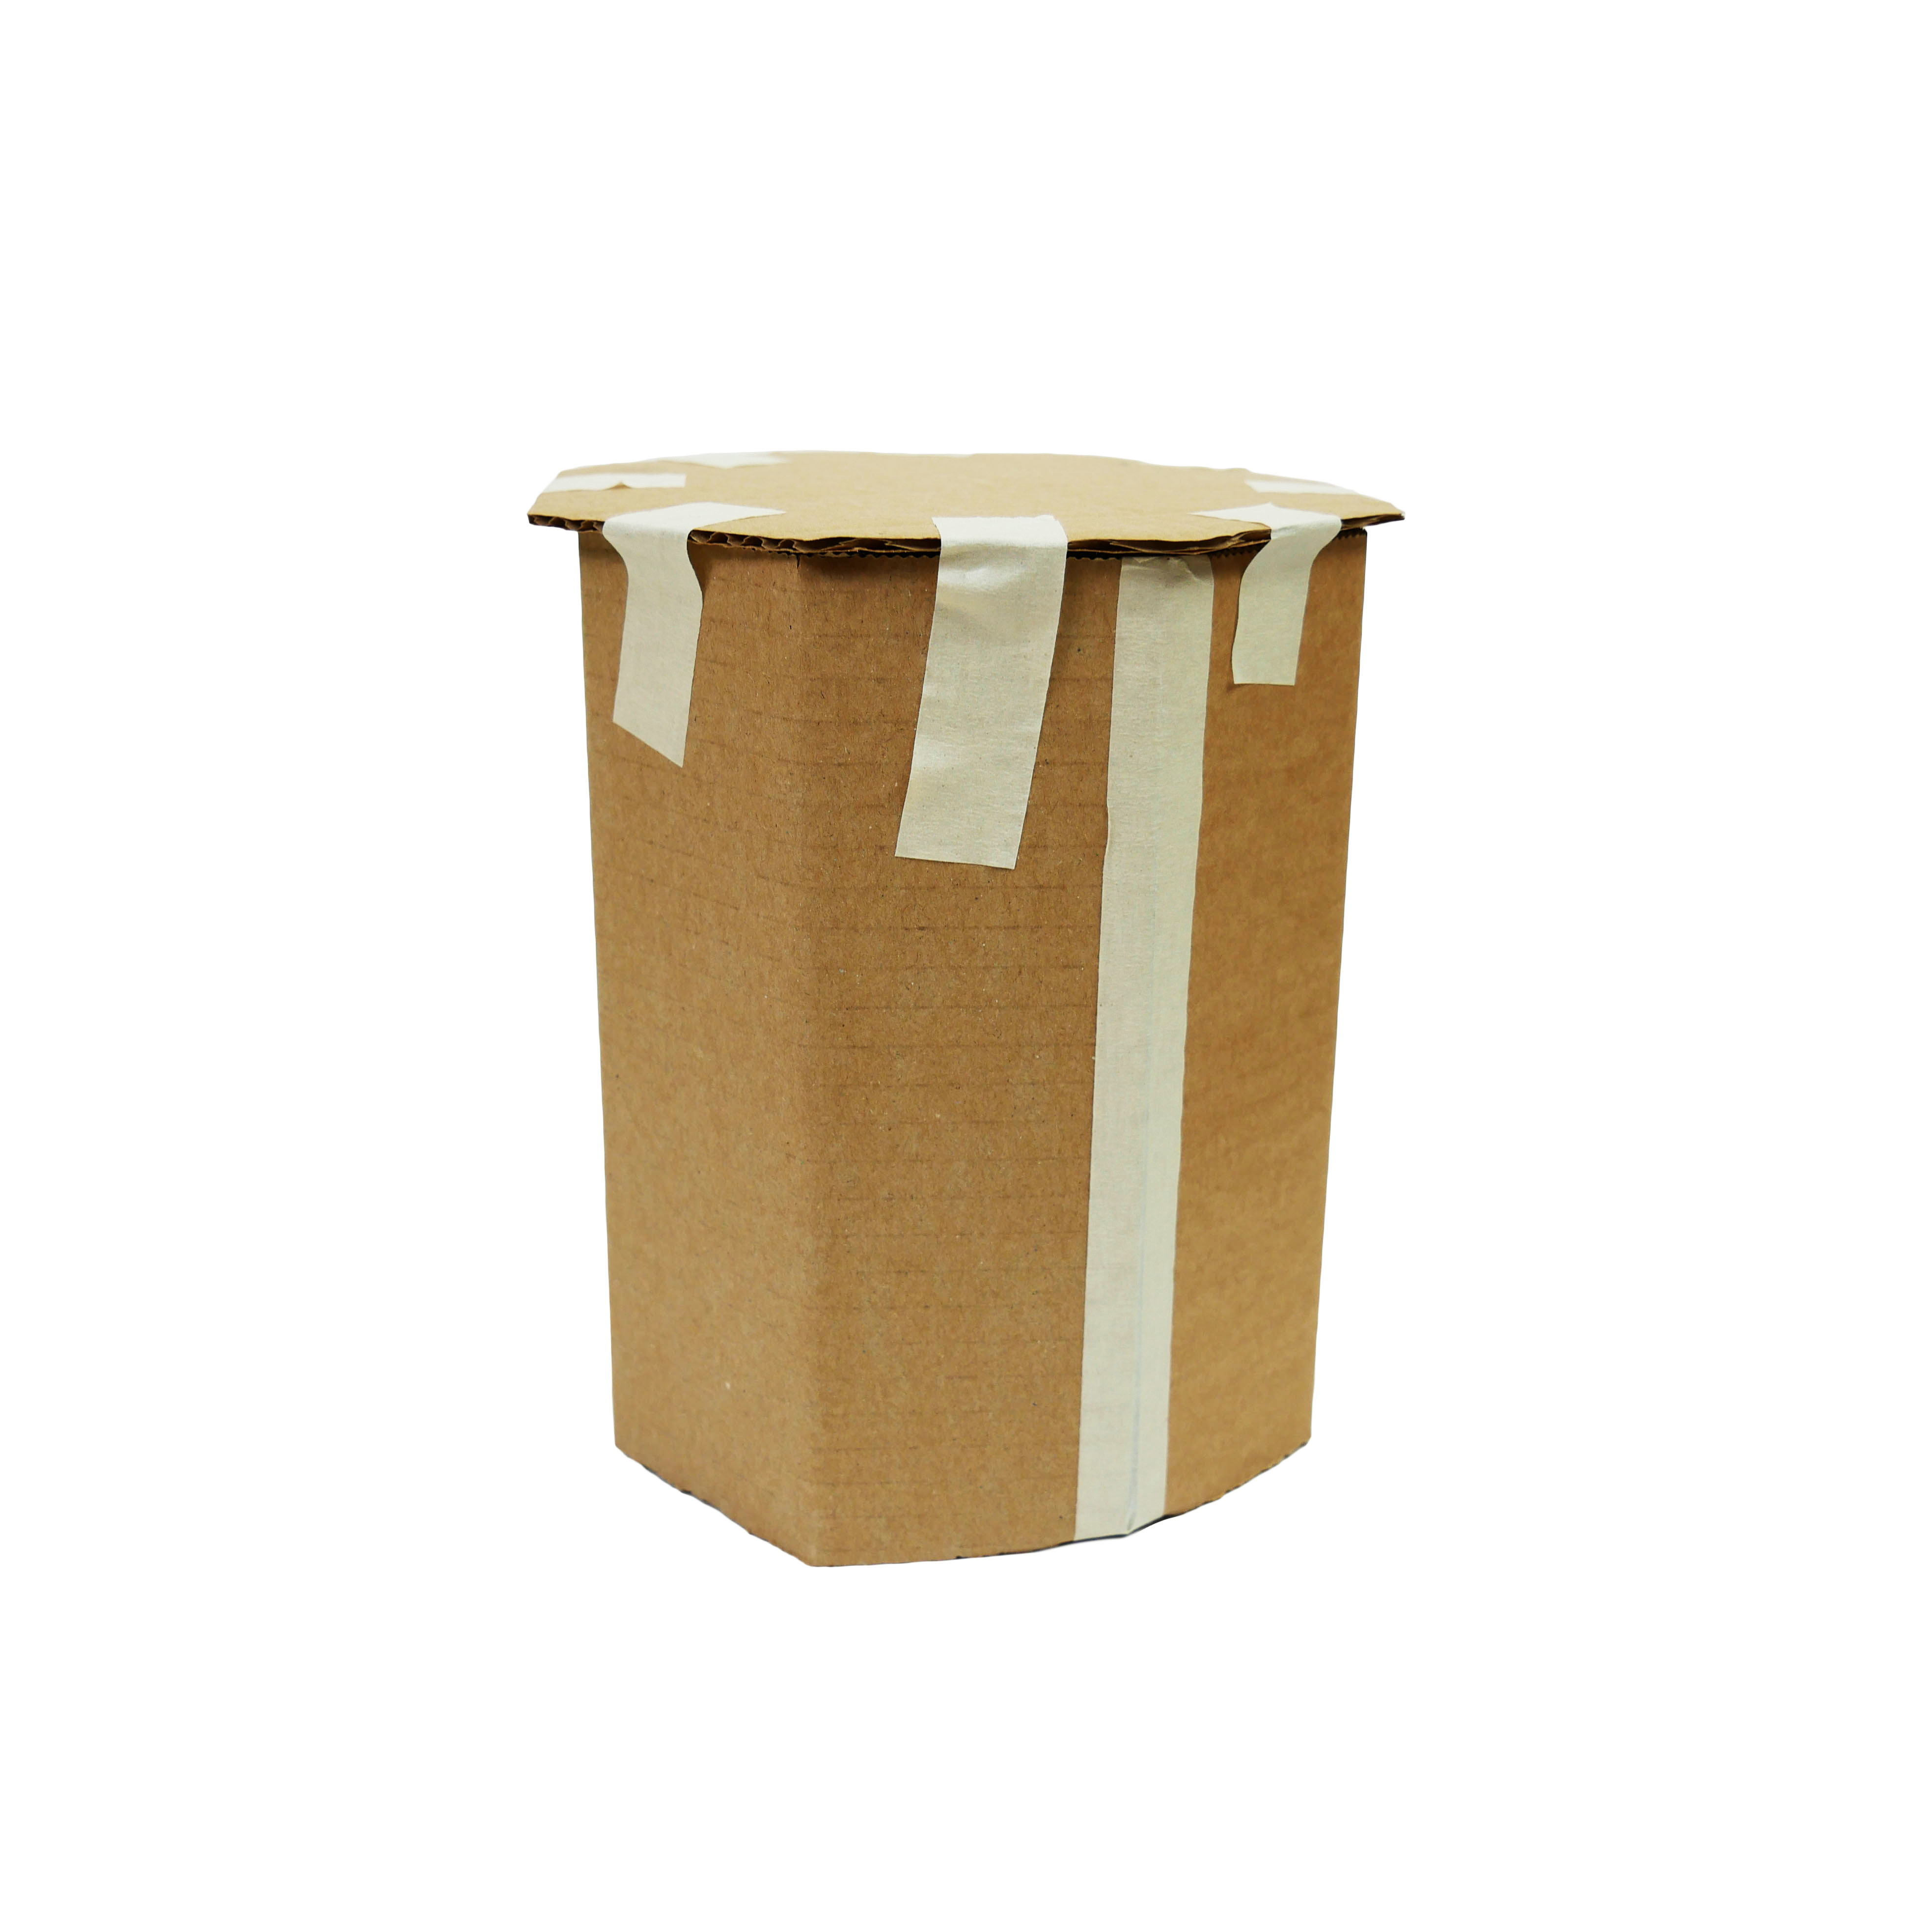
- To create a hexagonal prism, fold a piece of paper along into 6 equal parts along the long axis. Once the prism shape is formed, secure the open ends together with sticky tape. Stand the tower upright.
- To create a tall cylinder, roll a piece of paper along the long axis until it forms a cylinder shape. Once the cylinder shape is formed, secure the open ends together with sticky tape. Stand the tower upright.
- To create a short cylinder, roll a piece of paper along the short axis until it forms a cylinder shape. Once the cylinder shape is formed, secure the open ends together with sticky tape. Stand the tower upright.
- Balance the weigh boat on top of the tall triangle tower. Centre the weigh boat and add mass to it in 20 - 50g increments. Record the maximum load the tower can withstand before collapsing in Table 2.
- Following the same procedure, repeat the test for the remaining towers. Record the results in Table 2.

Designing your own structure
- Based on your experience assembling the bridge and tower prototypes in the above activities, what conclusions can be made on which structures and materials are stronger. Consider how the assembly method can be changed, improved or used to test a hypothesis.
- Develop a 1 sentence design challenge. For example, design a tower that can withstand 2 kg of mass. Write your design challenge here:
- Develop a design plan for a structure that fulfils the needs of your design challenge.
- Describe and draw the structure you will construct. Include annotations.
- List of the required materials you will need.
- Describe the building steps you will follow.
- Describe the method you will use for testing the structure.
- List the safety measures you will use to ensure no harm comes to yourself or others. List the safety equipment you will use to do this.
- Design a data table of what you will measure as you conduct your tests.
- Develop a criteria for success for determining if you met or exceeded your design challenge goals.
- Based on your design plan, construct the structure.
- Test your structure and record the results in the data table you created earlier.
- If necessary, make changes to the design. Record these modifications and determine if these changes had the desired impact.
OBSERVATION AND RESULTS
Below is an example of expected results. Individual results will vary.


INVESTIGATIONS
-
Ask students to consider modifications they made to their structure and how these modifications changed their results. Students should also identify what further modifications they would make to improve the design and describe what impact these changes would have.
- Challenge students to answer what force/ forces other than gravity cause the structures to collapse under the mass. Students should identify that compression was a significant force, and potentially torsion as a result of the materials twisting out of place.
 Time Requirements
- 45 mins
 Material List
- 6 Construction papers
- 1 Weigh boat (large)
- Stacks of books (or similar objects)
- Various masses. You may use objects with consistent weights; such as coins, beans, metal washers, marbles or small bags of rice.
- Ruler
- Sticky Tape
- Scissors
- Balance (optional)
- Any additional materials for students own design
 Safety Requirements
-
The support surfaces, structures and weights are likely to fall down when a bridge or tower collapses. Stand as far away as possible and take care to avoid injuries caused by falling objects.
